Patient:
62 y.o. female patient without any relevant systemic condition. She referred to the authors’ practice with instability on her full dentures in the upper and lower jaw.
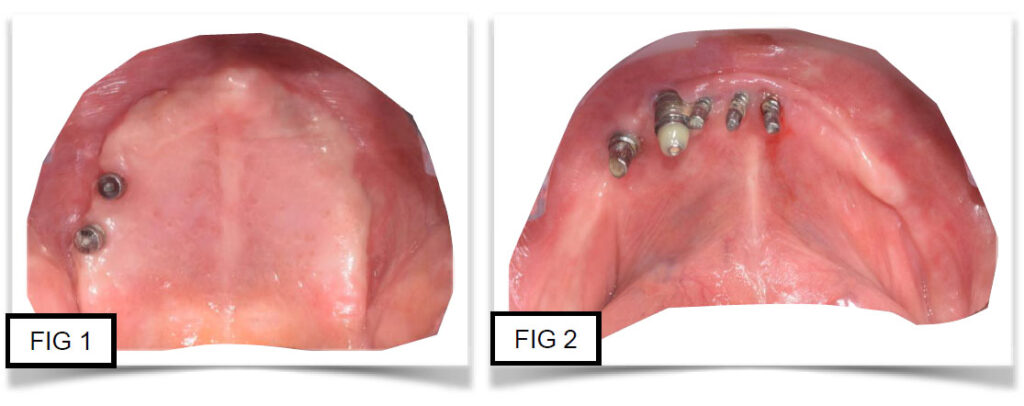
The physical examination (fig. 1,2) and the X-ray examination showed perimplantitis in the both arches.
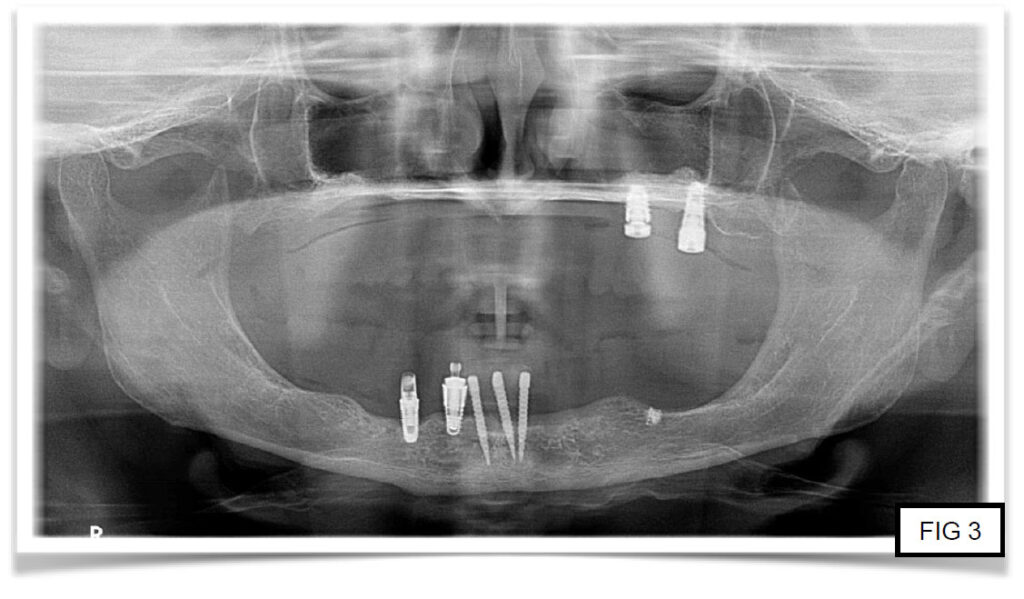
The OPG showed a severe atrophy of the maxillary and the mandible (fig. 3). Due to this serious atrophy, it was decided to plan an immediately-loaded implant-prosthetic rehabilitation with zygomatic and pterygoid implants for the upper jaw and intra-foramen standard implants for the lower jaw. It was decided to treat the maxillary with the Ezgoma® guided surgery and the mandible with a traditional guided surgery technique. For both arches, before the implant-prosthetic treatment, it was planned a digitally-manufactured removable full denture to restore the vertical dimension that was lost over the edentulous years and to make aesthetic / functional assessments. Such full dentures can be used as a diagnostic wax to drive the future positioning of zygomatic, pterygoid and standard implants. If a scan of the denture is made after its functionalization in the oral cavity, the related STL files can be imported into the guided surgery software as a diagnostic wax. Following this method, the virtual position of implants in the software was decided on the basis of bone availability and prosthetic considerations.
PRE-SURGICAL STAGE
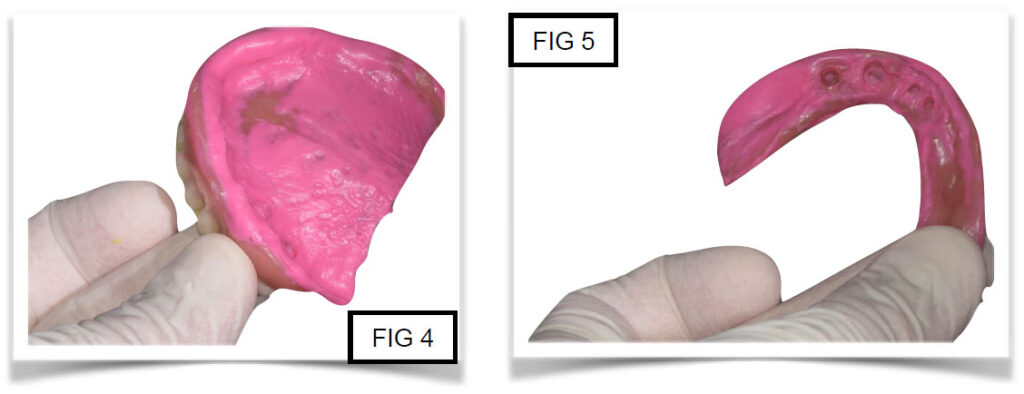
The first stage involved the digital impression taking of the existing dentures on their buccal and palatal portion, after rebasing, and their ratio of maximum intercuspation (fig. 4,5).
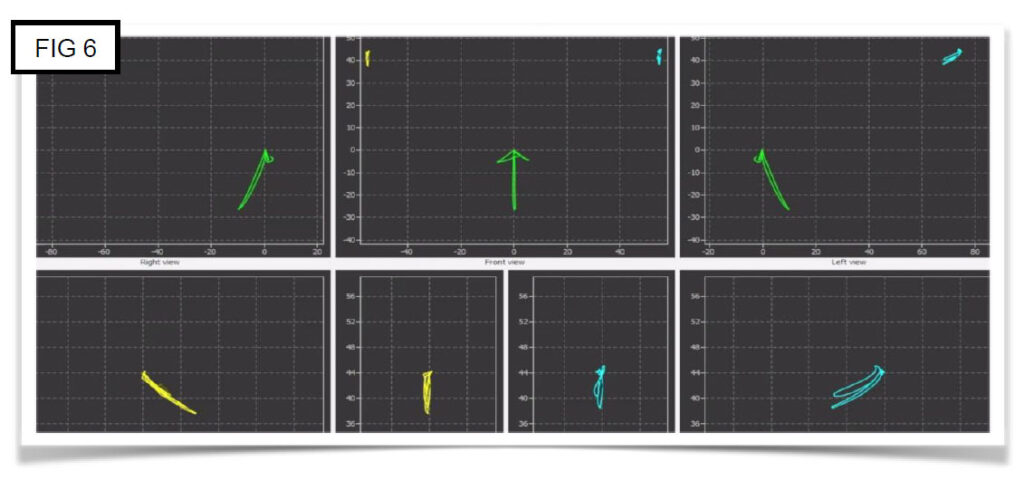
The following step was the recording of condylar movements by means of a digital axiography (fig. 6). The axiograph records the opening and closing movements of laterality and protrusion; in this case it was possible to record condyles also during chewing cycles, by giving a patient a chewing-gum for the axiography. The collected data were imported in the software and realigned with the intraoral scans and the patient’s CBCT.
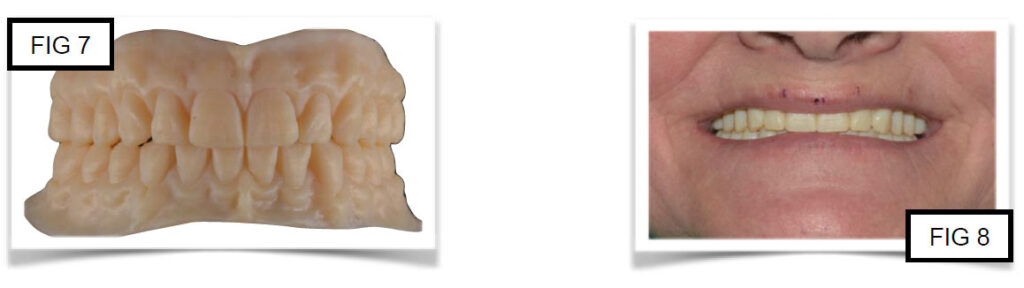
Subsequently, the files have been realigned in the lab CAD software, for the technician to design the teeth of the patient after making the movements in the digital articulator that strictly followed the movements recorded by the axiography. Through the software tools, the technician can “functionalise” the future teeth of the patient. By moving the slider according to the axiography, if a peek or a side of the designed tooth does not match the condylar path, the software turns on an alert. The alert remains on until that side or peek is eliminated through the CAD software tools. Then, the processed files were sent to the 3D printer that produced the prototypes with the CAD-designed anatomical features (fig. 7). The prototypes were tested in the oral cavity to evaluate vertical dimension, occlusion, articular movements, and aesthetics (fig. 8).
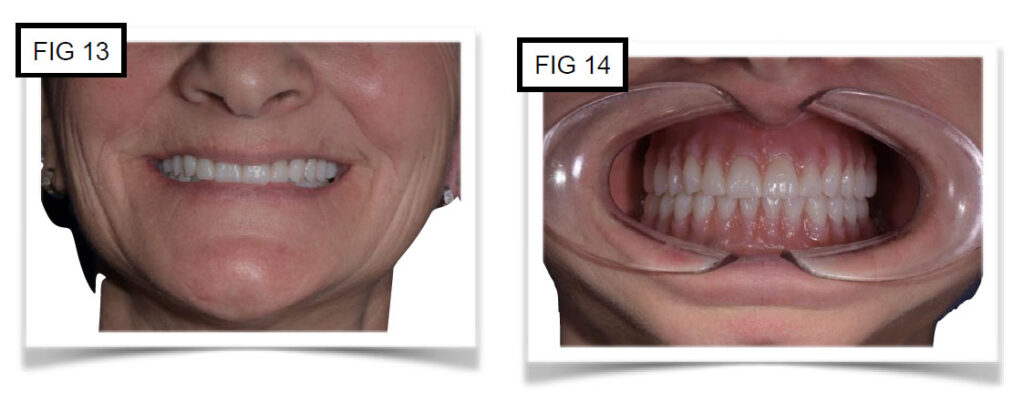
Only when all the clinical conditions were achieved with the prototypes, it was possible to send again to the lab for the manufacturing of the prosthetic restorations. The full restoration of the patient was made with 3D printer and milling machine from the scan of the clinically approved prototypes. The 3D printer produced the pink prosthetic base, while the milling machine produced the teeth to be bonded inside (fig. 9,10,11,12).
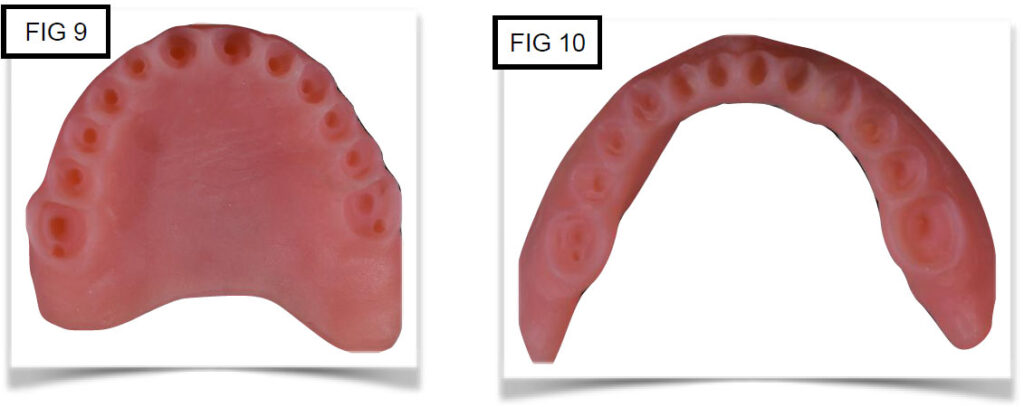
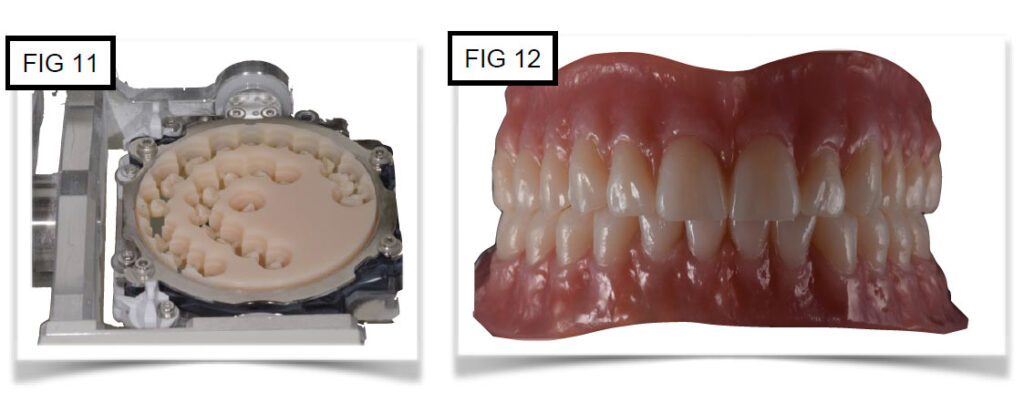
Fig 11 – The digital dentures wore it for a time evaluate their correct manufacturing.
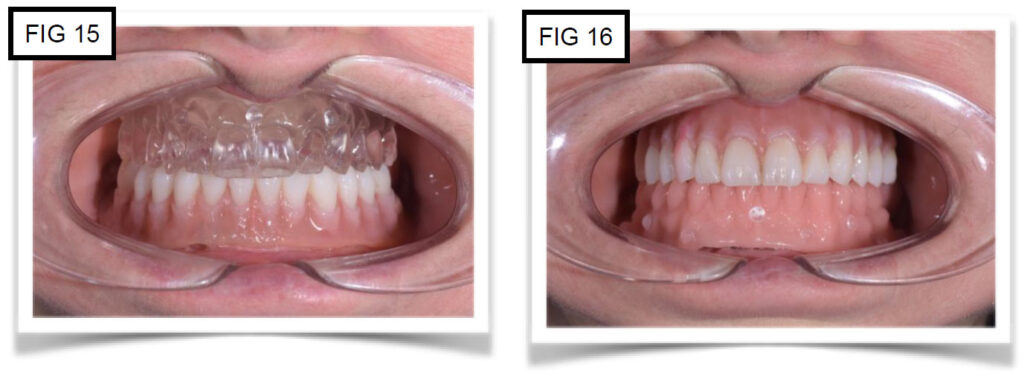
Fig 12 – Were delivered to the patient who considered clinically valid to evaluate their correct manufacturing (fig. 13,14).
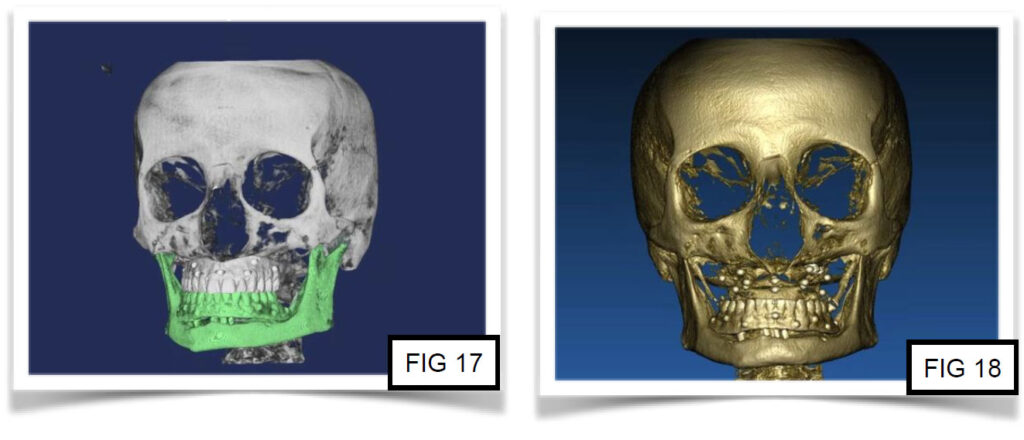
Only after making all the clinical assessments on the new dentures, it was possible to get the radiological copies to make a CBCT. As the radiological guide was an actual copy of the restorations (fig. 15,16), it allowed the operators to have a functionalized diagnostic wax inside the guided surgery software, enabling to insert virtual implants in the bone in a guided way from the prosthetic and functional point of view.
SOFTWARE PLANNING STAGE
The patient was referred to the radiological laboratory to make the CBCT with radiological guides. This CBCT was uploaded in the guided surgery software. The STL files from the scan of the patient’s restoration were imported in the software as well (fig. 17, 18).
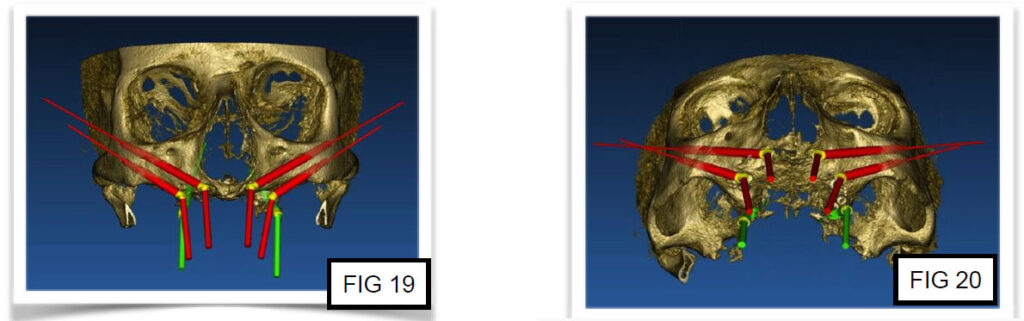
Once the DICOM files of the CBCT and STL files of the restorations were imported in the software, it was possible to make the overlapping and get bone and diagnostic wax in a single image. In the software, 4 zygomatic and 2 pterygoid implants were placed in the upper jaw, and 4 intra-foramen traditional implants in the lower jaw (fig 19,20,21,22)

The software-built project was sent to the guide manufacturing centre that prepared an upper EZgoma® guided surgery in laser melting and a lower guide in traditional resin.
SURGICAL STAGE
After an infiltration with articaine and adrenaline, a slightly palatal crestal incision with distal release from tuber to tuber was made to perform a skeletonization in the buccal part of the maxillary, up to the zygomatic region. This stage must be thoroughly performed to enable a correct positioning of the EZgoma® template and a successful surgery. The bone-supported templates are fixed by means of software-planned osteosynthesis screws.
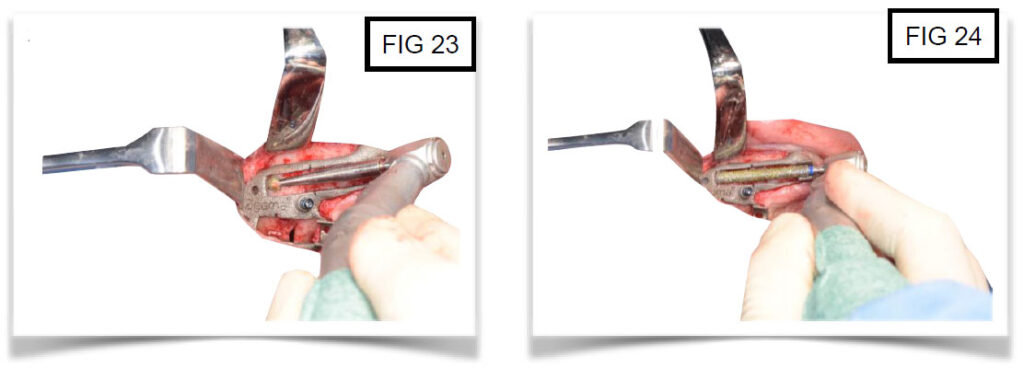
The first step of the EZgoma® drilling protocol involves the diamond ball burr to make a slot in the buccal wall of the maxillary sinus (fig. 23). The following diamond tapered burr has a smooth apical portion that perfectly fits the slot made by the ball burr. The ball burr was positioned in the initial hole to rotate inside the guide rails until the creation of a tunnel in the bone with the same diameter of the implant (fig 24).
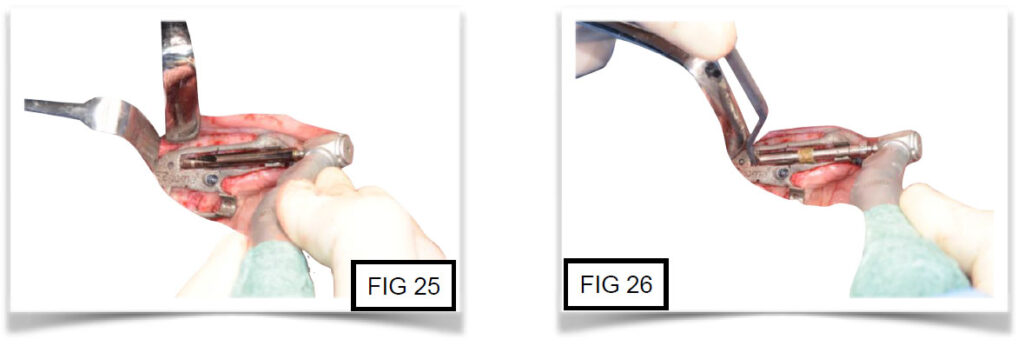
The last diamond burr was used after the positioning of a sleeve reducer enabling a countersink at the crestal level to place the multi-unit abutment (fig. 26). Before placing the sleeve reducer, it was necessary a bone preparation drill (fig. 25).
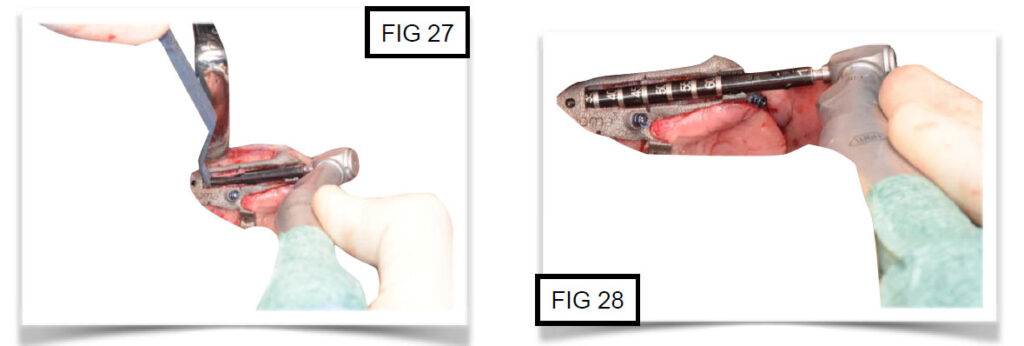
The following drill sequence enabled to insert zygomatic implants in accordance with the prosthetic plan. The template has markers to match the length of the planned implant (fig 27, 28).
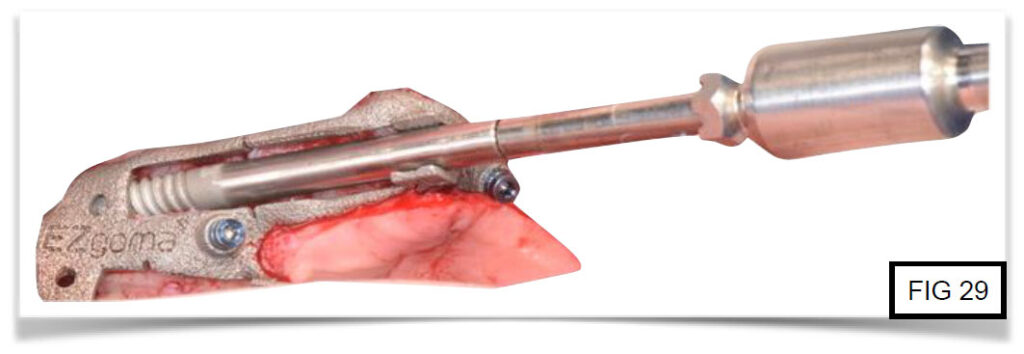
In the following step, the implant was placed in the new socket by means of the related mounter. The implant length was confirmed by the presence of the marker in the surgical template (fig. 29).
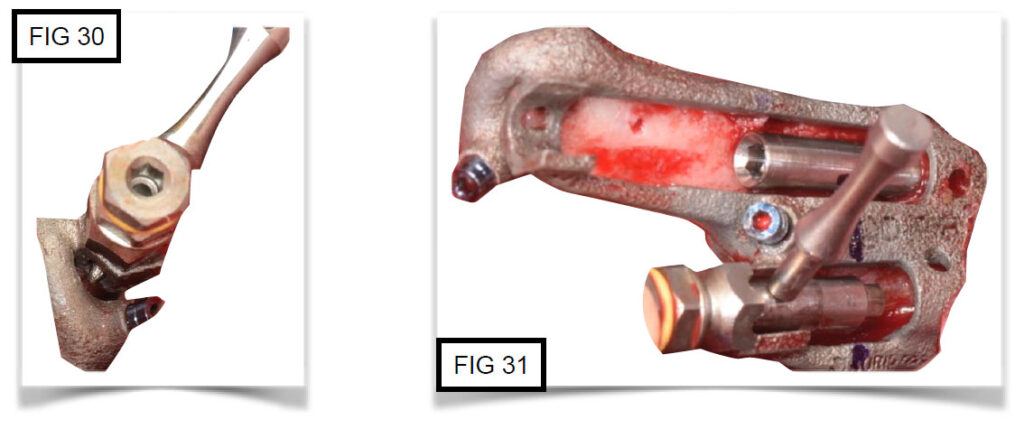
The EZgoma® procedure enables to also place the angulated abutments in accordance with the pre-planned surgical and prosthetic project. This requires an indexed position of the implant hexagon, provided using pins in the two holes of the mounter and the surgical template that shall coincide (fig 30, 31).
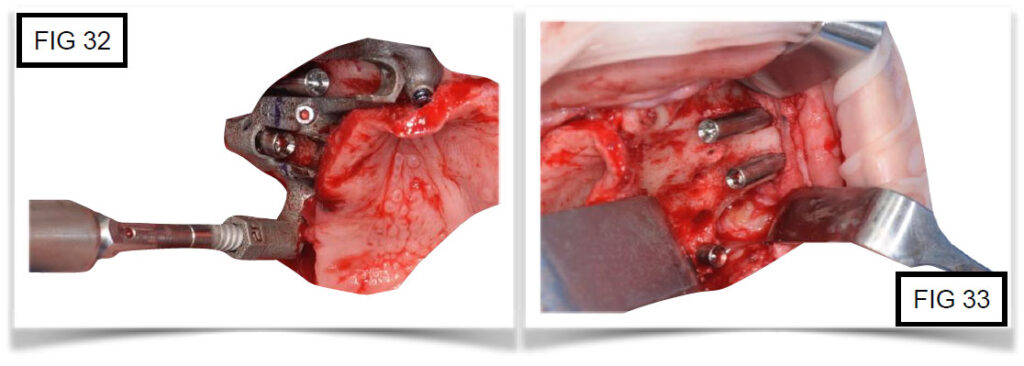
After positioning the zygomatic implants, the procedure for pterygoid implants was started. The procedure for pterygoids takes shorter. The first drill prepared the maxillary bone while the second and last one was used in association with a sleeve reducer until the pre-planned length (fig. 32, 33).
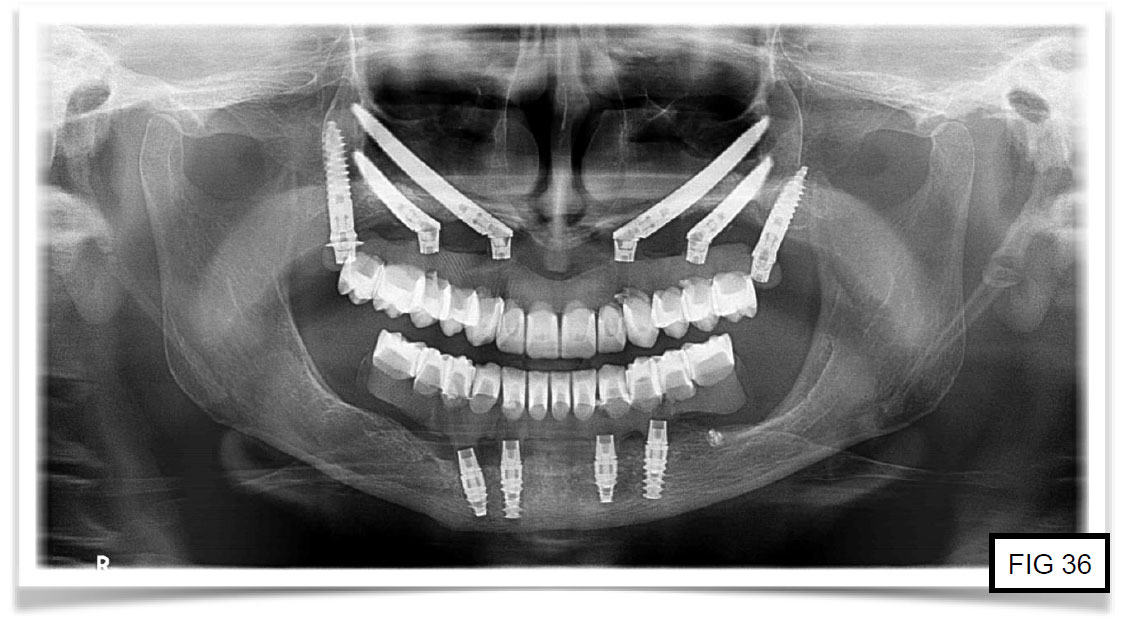
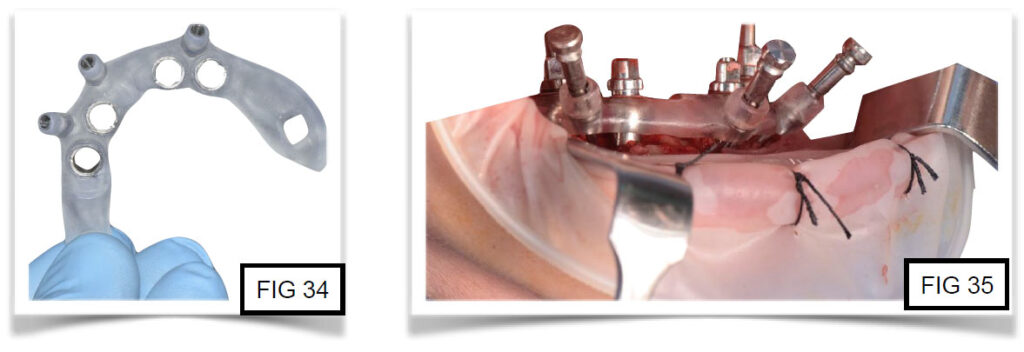
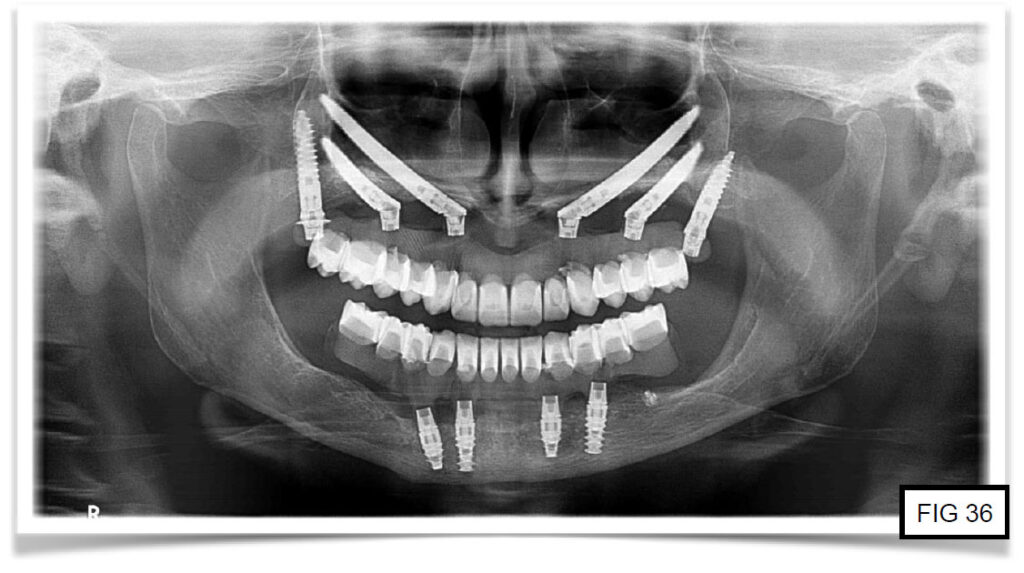
Once the pterygoid implants were placed too, the upper jaw is complete. In the lower jaw another guided surgery was performed with the flapless insertion of 4 standard implants. The surgical template was fixed by 3 positioning pins and a bone profiler was used to remove the gingiva ridges. The following drills were used in accordance with the surgical protocol until the insertion of implants in the new socket (fig. 34,35,36).
PROSTHETIC STAGE
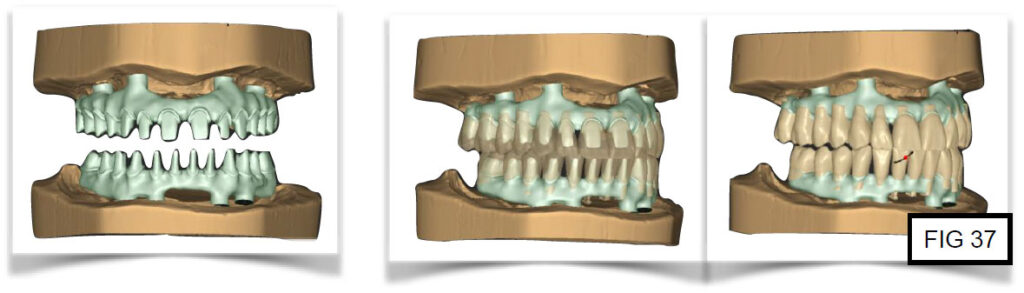
Thanks to the implant-prosthetic project, it was possible to manufacture the final restorations without taking any post-op impressions, as this kind of planning enables to know in advance the angulation of abutments and to have a functionalized diagnostic wax (fig. 37).
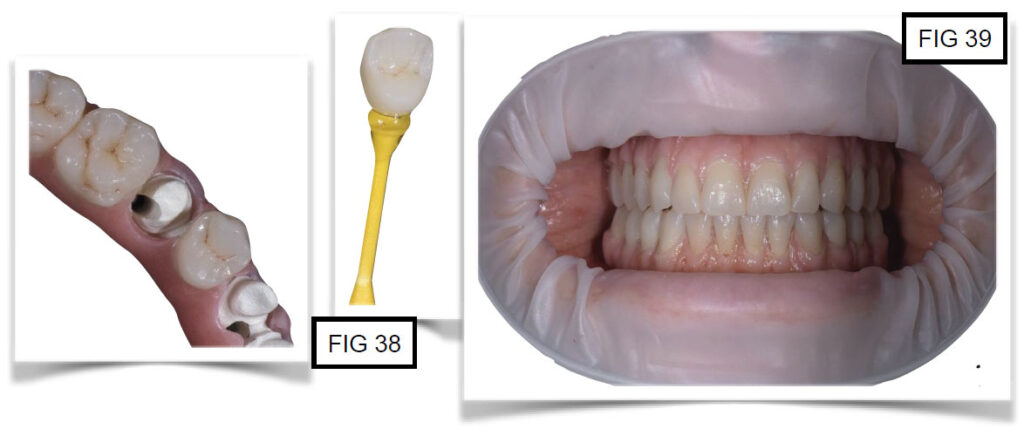
24 hours after the surgery the two arches were immediately loaded. The restorations were screwed under controlled torque. Furthermore, crowns for cementation were made for those elements including sites for the fixation screws (fig 38, 39).